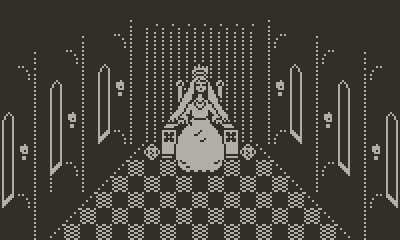
Playdate is a curious little game console. It looks a little bit like a "retro" system, but the hardware inside is quite modern. When creating a game for Playdate, there are some unique considerations to keep in mind, such as its small physical size, 1-bit screen, and crank.
This document offers advice on how to make your game more accessible and pleasant to play. Much of this is subjective, informed by our own experience developing for Playdate. We don’t enforce these guidelines. But be aware that not considering the guidelines may limit the potential audience for your game.
1. Screen
Playdate has a Sharp Memory LCD screen. Although similar in appearance to e-ink, it is able to refresh at much higher rates. It also has a very small pixel pitch, the distance between pixels. This gives it the appearance of paper—specifically, newsprint.
Like the printed page, Playdate has no backlight. But the screen is highly reflective, so the more ambient light the better. You won’t be able to play in a dark room without a light source, but your game will be beautifully sharp and clear if you’re outside on a sunny day or in a well-lit room.

The screen resolution is 400 × 240 pixels, at 173 pixels per inch. That means the pixels are quite small for the physical size of the screen, unlike a 1990s handheld console. It’s a pocket-sized screen, and you should note this when sizing your game’s graphics and fonts.
The screen is surrounded by a black bezel, 3 mm wide. In good lighting conditions, this will blend into the black of the screen. You can use this to your advantage by pushing your graphics all the way to the edge.
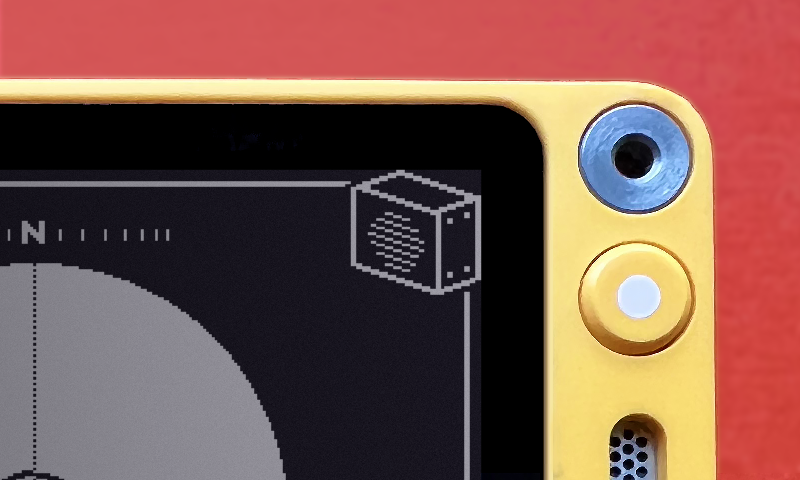
Playdate’s screen is asymmetrically offset to the left side of the device. You don’t have to keep this in mind if you don’t care, but if you ever want to center an onscreen element on the physical Playdate, that vertical line is 28 pixels to the right of the center—so, at 228 on the x axis.
1.1. Sprites
For the purposes of this document, we’ll consider “sprites” as playable characters, NPCs, and other moving, visible entities in your game.
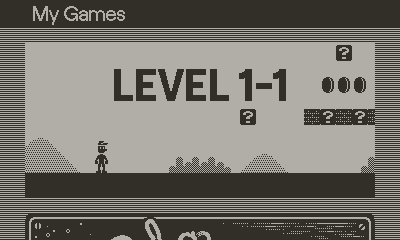
A reasonable minimum size for your player sprite is somewhere around 32 × 32 pixels. Sprites much smaller than this will be hard to make out on the screen.
As for a maximum size, there’s no real ceiling on this. Some games deliberately use very large characters.
However, note that this doesn’t mean that everything in your game should be scaled up, resulting in a lot of scrolling.
Small sprites are easier to see and track with your eyes if they move a lot, or if they have particles and other effects following them. In slower games, players might appreciate larger sprites.
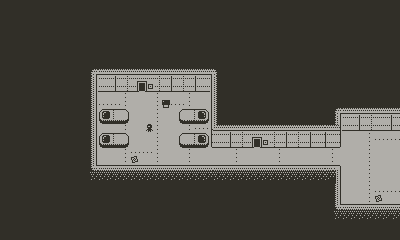
1.2. Tiles
If your game is based on a tile map—a layout grid for items and characters in the world, each of which is typically one "tile" in size—you should ensure the tiles aren’t too small for comfort. This is an example of a tile size that could cause the player’s eyes to strain:
And here’s a game with a comfortable tile size:
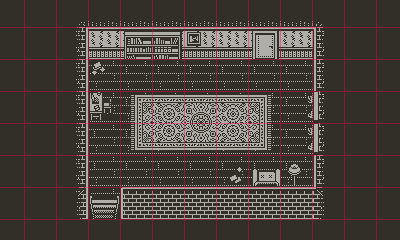
A tile size that’s a power of 2 is handy when authoring your art; its easy divisibility means you’ll be able to create a number of repeating patterns.
1.3. Text
Your game might use fonts for different kinds of text, such as titles, dialogue, labels, or status information. It’s important to make all text legible, and it’s particularly important when the player is expected to read a lot of it, and often.
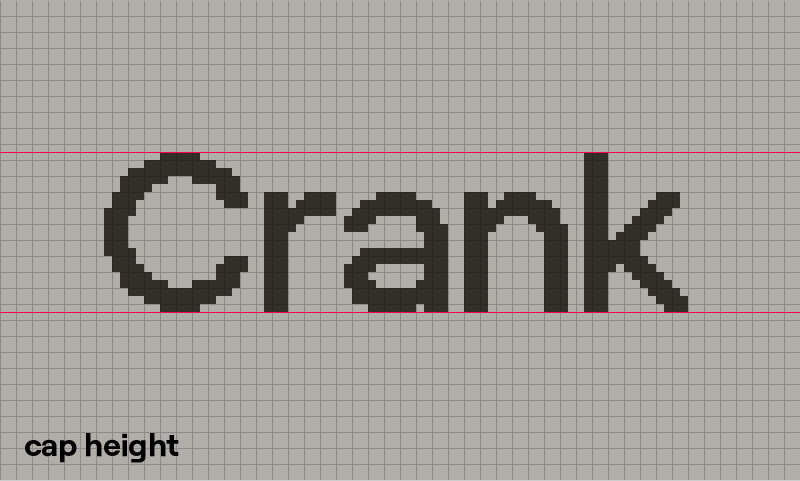
When discussing “font size” below, we mean the cap height—the height of an uppercase letter, from the baseline to the top of the letter (or an ascender). This isn’t the same as the total height of the font, which will be greater, to allow for diacritical marks, punctuation, etc. A font based on a grid 20 × 20 pixels in size will usually have a cap height of 14 pixels or so.
Dialog text should be at least 12 pixels tall, and preferably 14 pixels tall. HUD text (score, health, level name) can be slightly smaller, down to 10 pixels tall. This holds true if the player isn’t meant to read the text very often.
All text, including small disclaimers or subtle jokes, should be at least 8 pixels tall, unless your idea is to deliberately obscure it.
A game in which text is more important than graphics should have decently sized text in a highly legible font. Classic rules of typography apply: clear, strong shapes; good contrast between similar characters; generous x-height.
We recommend that you make your font strokes at least 2 pixels thick. Thinner fonts will be rather wispy when seen on the screen.
A good way to judge the legibility of the fonts in your game is to hold up your Playdate against a printed book. Your font should be physically similar in size to the letters on the page—or larger than them.
If you import a computer font using our Caps tool, note that it may or may not be hinted (snapped to pixel boundaries) properly at the size you specified. An improperly hinted font could look like this:
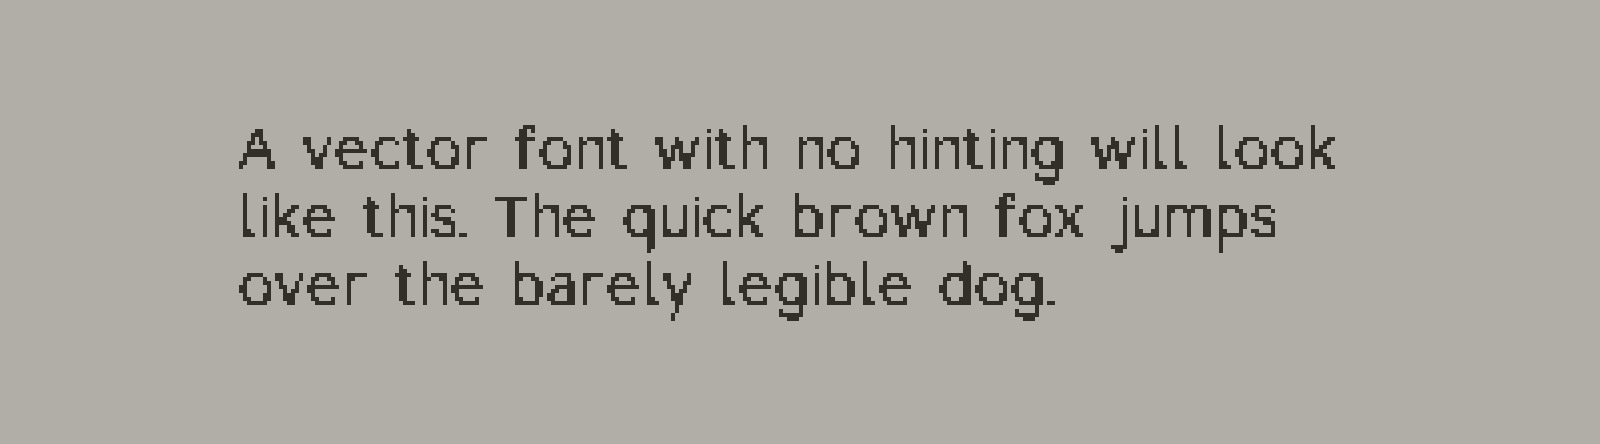
In this case, you might need to touch up the font manually.
1.4. 2x Graphics
Some developers choose to render their games at a different display scale (using playdate.display.setScale). This results in larger, chunkier sprites, which can be easier to follow, though they sacrifice a finer level of detail.
Fonts rendered at 2x will need to be carefully designed. There’s always room for creativity, even with very few pixels, but legibility should remain a primary concern.
1.5. Transforming bitmap images
It’s common for sprites in games to rotate, scale, or stretch. You may be tempted to do so in code, which would be the simpler and more maintainable option. However, this may have two undesirable consequences:
-
Rotating or scaling your images is CPU-intensive. Playdate has no GPU.
-
The resulting images could look distorted and noisy.
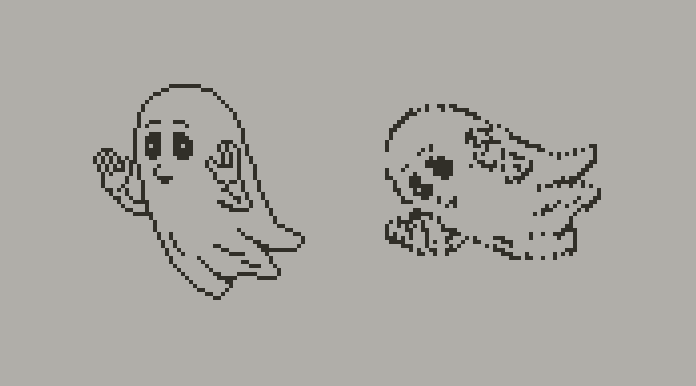
Here’s an example of a programmatically rotated sprite:
An alternative is to pre-transform your graphics in an editor app, or with an image-processing script. 1-bit graphics take up very little storage and are quick to load. You can then also clean up any distracting pixel artifacts in these images. Image tables can be used to conveniently access multiple transformations of the same image.
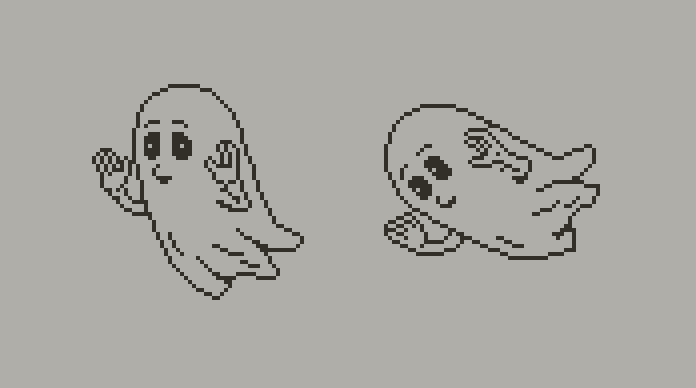
Choose the method that makes sense for the type and performance requirements of your game. Transforming sprites programmatically isn’t necessarily bad. It typically looks fine if the sprite moves quickly and stops in its natural, untransformed state:
Or, if the sprite is very large and not too detailed:

You don’t have to create every graphic in your game from scratch, placing your pixels one by one—but it’s not a bad idea to do some touch-up for clarity.
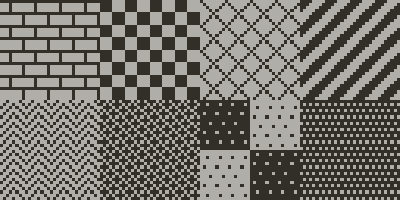
1.6. Dither patterns
Black-and-white pixel art often uses dithering to convey shades and textures.
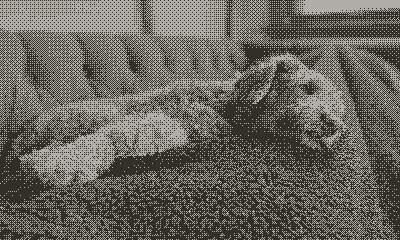
Some graphics apps will convert color art into 1-bit dither patterns for you. While this is a reasonable way to go about making art for Playdate, note that the resulting images may look quite noisy.
As with transformed sprites, it’s best to clean up any such graphics manually.
1.7. Dither flashing
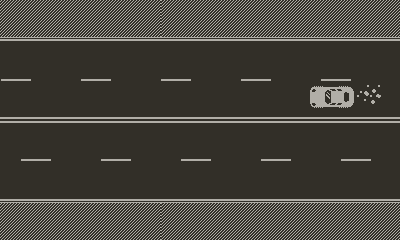
If you use a checkered pattern 2 x 2 pixels in size and scroll it by 1 pixel at a time, all the black and white pixels in this pattern will swap as you scroll. This can cause the display to flash in a distracting or annoying way.
Click here to view an approximation of this effect. Note that this image is by its very nature unpleasant; people with sensitivities to flashing images shouldn’t view it.

Here are some strategies you can try to minimize this:
-
Always scroll by a multiple of 2 pixels, which will result in the black and white pixels staying in the same position on the screen.
-
Apply the pattern after scrolling. You can do this by masking the dithered area and drawing it separately.
-
Consider a different pattern. If your game will scroll horizontally, use a horizontal pipeline pattern, which won’t shift any pixels when moved.
This flashing artifact may be noticeable with other dithers as well, and you can use these same approaches to fixing it.
1.8. Refresh rate
By default, Playdate games run at 30 frames per second (fps). This will look smooth and perform well in most cases. Sequences with lots of movement should ideally run at 30 fps. If your game drops down to 20 fps, it will still be acceptable, especially if your animation style is chunky and you’re not scrolling the entire screen frequently. In games with little movement and big, instant jumps in position (a board game or card game, for example) the frame rate doesn’t matter as much, and you can even request a lower refresh rate from the system to conserve battery life.
The maximum refresh rate you can set is 50 fps. This will look even smoother, and it’ll be particularly noticeable when moving graphics along curved paths. Note that at 50 fps, all other things being equal, your game has 40% less time to execute its code on each frame. You’ll have to optimize the code to hit that high fps. It may be necessary to write high-frame-rate code in C, rather than Lua. There may also be a negative impact to battery life.
1.9. Screen accessibility
The player can set certain accessibility preferences in Settings. See the Accessibility section of Inside Playdate for information on how to read these, and how to adjust your game to suit them.
2. Sound
Playdate’s 1-bit screen might suggest the audio of an older console, limited to beeps and boops, but it actually has very modern sound capabilities. You can play compressed or uncompressed audio at 44,100 Hz.
Playdate has a powerful little speaker built in. Given the small size of the device, this speaker may have a different audio profile from your computer’s speakers, or the headphones you wear when you test your game. If possible, test your audio on the Playdate itself to make sure everything sounds the way you’d like. Listen for bass notes too low to be audible, or peaks that appear noisy through the speaker. Also try your game on device with headphones plugged in.
Audio samples gathered from different sources will differ in their output level; some will be louder than others. It’s a good idea to check the levels of your samples and normalize them to the same range of loudness. You can establish this target level by comparing your audio to other Playdate games and system sounds when set to the same system volume. Players will appreciate it if a game isn’t substantially quieter or louder than others if the system volume has not been changed.
2.1. Sound accessibility
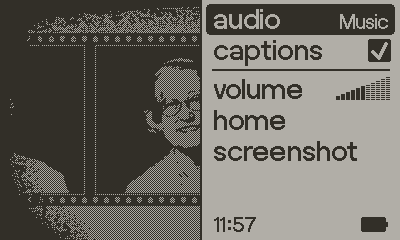
Playdate is a handheld console, and players might take it to environments where they can’t hear it well or play it loudly—in a busy park, on the bus, in a quiet room. Keep in mind deaf or hard-of-hearing players as well. Consider these options:
-
Provide subtitles for dialogue.
-
Indicate sound effects with onscreen blips and other visual feedback.
-
If audio is crucial to your game, let the player know. Advise them to un-silence their device or use headphones—perhaps on your game’s start screen.
3. Crank
The crank is a unique and versatile input method. It can be used for fast, athletic controls in a sporty game, or it can be delicate and precise in a balancing game. Deciding how to map the player’s crank movement to changes in the game will make a game feel more muscle-heavy or more precise. As with other inputs and outputs, playing on the actual hardware will be the most instructive way to test and tune.
3.1. Using buttons and the crank together
If your game needs one primary button in addition to the crank, it might be best to use the B button instead of the A button (even though we typically recommend the A button for the primary action). For a right-handed player, using the crank with the right hand, while using the left thumb to press the B button is a fairly natural and comfortable way to hold the device. Using the crank with the A button simultaneously might require too much reach or become uncomfortable over an extended period of time.
Alternatively, you can use the d-pad as up to 4 action buttons if you’re not using it for movement. For instance, if your game needs the crank, an “action” button (A) and a “pick up” button, the d-pad’s right button could be used for “pick up.” While that’s not an action that naturally maps to the rightward direction, the overall experience of pressing this button may be more comfortable in the long run. This may also be more comfortable for a left-handed player using the device with the Upside Down system setting.
3.2. Crank accessibility
Some players have difficulty using the crank. When possible, provide d-pad alternatives to crank controls. For example, if the d-pad’s left and right (or up and down) buttons aren’t otherwise used in your game, they could be mapped to forward and backward cranking.
4. Buttons
The A button has the natural connotation of “confirm,” “go,” or “primary action.” The B button tends to mean “cancel,” “go back,” or “secondary action.” During gameplay, you can use them however you think makes the most sense. In menus and other housekeeping views, we recommend you stick to the expected behavior. Players will expect the A button to activate elements, and the B button to close modal views and step back in nested menus.
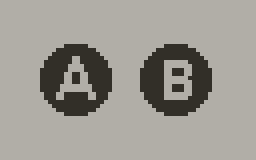
When instructing the player about your game’s UI, it’s helpful to enclose the A and B in circles, as they are on the device itself:
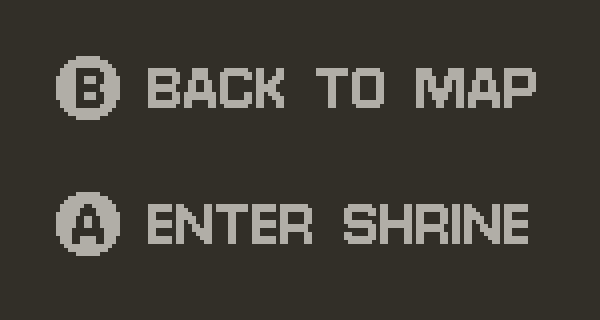
We provide glyphs for this in many of our fonts, mapped to the following characters:
Ⓐ Ⓑ
By the way, we have also font characters for other Playdate buttons:
🟨 ⊙ 🔒 🎣 ✛ ⬆️ ➡️ ⬇️ ⬅️

4.1. Button accessibility
If your game needs only one or two buttons, consider allowing these actions to be performed with more than one button, as well as the crank. For instance, if your game has just one “jump” action, you could map this to the A button, the B button, the up button on the d-pad, and a turn of the crank. That way, the player can choose whatever input is most comfortable for them.
5. Accelerometer
Playdate has a 3-axis accelerometer. This can tell you how the device is tilted on x, y, and z axes. Note that unlike a gyroscope, an accelerometer can’t report non-gravitational acceleration. This means if you place your Playdate on a flat surface, then twist it while keeping it flat, the accelerometer won’t see any change in gravitational forces. In most cases, the accelerometer will be sufficient to tell you whether the device is leaning one way or another, if it’s being shaken, or if some other motion-based gesture is happening.
It may be a good idea to include accelerometer calibration in your game, to let the player reset the "zero" position. For instance, if they’re playing while lying down, they will expect the "zero" position to be different from a Playdate lying down on a flat surface.
To see the accelerometer in action, launch the Input Test tool inside the Settings app, in the System section. Its readout should make clear what motions are reported and how. This tool is handy for inspecting the various hardware inputs of your Playdate.
6. User Interface
Playdate doesn’t have a lot of system UI. There’s the Setup process, the Home screen, the Menu, and Settings. These are designed to be clear, readable, quick to use, and playful where appropriate. Beyond that, we’d like your games to be the star of the show.
We don’t provide many UI widgets for games to call through our APIs. Most developers like constructing their own buttons, menus, and sounds, to match their game. Some of the Playdate APIs will help with this, such as playdate.ui.gridview.
6.1. System font
Most of Playdate’s system UI is set in the font Roobert 20 Medium, available as part of the SDK Resources. For larger headings, we use Roobert 24 Medium. This is a legible font set at generous sizes—when possible, aim for this level of text clarity.
If our text-drawing APIs aren’t given a font to use, or when they fail to load a font or a character, they will default to the font Asheville 14. This font is specifically meant to communicate to you that something has gone wrong with your text-draw. You should replace Asheville with another font for better legibility.
6.2. Onscreen keyboard
You can call playdate.keyboard.show to show a keyboard for text entry. This could be useful for entering the player’s in-game name, or for other short text input. The keyboard is meant to make text input fast and sensible. That said, we can only make it so effective on a handheld console; if your game expects a lot of text input, it’s worth pondering if that will be fun. Perhaps a custom keyboard designed specifically for your use would be nicer.
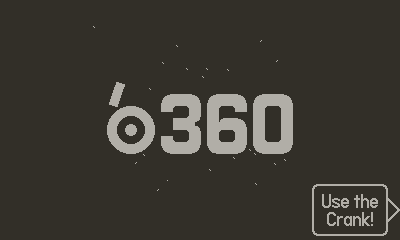
6.3. Crank indicator
Inside Playdate covers the use of the playdate.ui.crankIndicator API. It may not be obvious at first to a brand new player that your game is crank-operated, since not all games will be. The crank indicator provides a standardized way to nudge players in the right direction.
6.4. QR codes
If your game needs to point the user to a short or memorable URL—for example, play.date—showing it is as a text label is fine. Anything that’s generated by the game, long, or too complex to type into a web browser, is best done by displaying a QR code. (See playdate.graphics.generateQRCode).
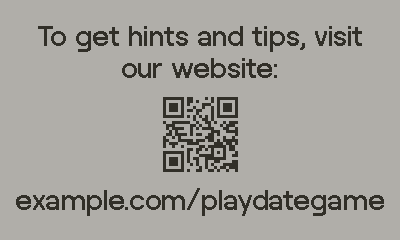
However, it’s possible the user might not have a way to scan a QR code, so displaying the URL in addition to the QR code may be appropriate.
7. Launcher
Your game’s metadata typically won’t be seen by the player in the launcher. However, they will be able to see it in the Games section of Settings. They may explore this on their own, or use it for support purposes. This means it’s still important to provide accurate and helpful information here: your game’s name as you want it to be used by your players, and its current version number.
See System and Game Metadata for details on how to configure your game’s metadata.
7.1. Launcher card
The launcher card is the player’s first impression of your game, and it’s the game’s representative artwork on Playdate. They should be able to recognize the game from it, and it should perhaps make them feel however you’d like them to feel about your game: curious? excited? challenged?
Note that Playdate doesn’t display a label with your game’s name. You should include the name in the card image itself.
Launcher cards can be changed and animated at several points: when selected, when the player presses A to launch them, and as your game is loading. Chaining these animations can provide a smooth transition from the launcher to the first screen of your game.
Of course, you don’t have to make it a smooth transition if you have another sort of cut between the launcher and game in mind.
See System and Game Metadata for details on how to configure your game’s launcher card.
7.2. Menu
If your game has options and features you don’t wish to include in the game’s UI, you can add them to the System Menu.
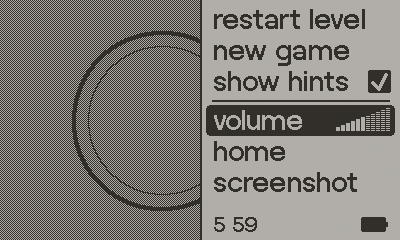
It’s up to you which features you put in the menu. Here are some examples:
-
Options like turning music on and off, or changing the font size.
-
A link to your game’s own options screen, if you need the whole screen for this UI.
-
An in-game feature like the inventory, map, or character customization.
-
Game-flow features like restarting the level, or starting a new game.
Since there’s limited space in the System Menu, you may wish to collapse several rows into one row with multiple options.
Note that players might need to be told to look for this option in the Menu; if your game teaches the players about its controls, it might be a good idea to call out your custom menu options.
See Interacting with the System Menu for information on how to set up your custom menu items.
7.3. Menu Image
While your game is paused, it can show a custom image the left of the System Menu. (See playdate.setMenuImage.) Since you can create this image in code, it can include game-data, thus becoming another view in your game.
8. Performance
A well-optimized game will run smoothly, without stuttering, dropping frames, or freezing. It will also use less battery power—a concern that may be important when players aren’t near a power source. As much as possible, try to spare the Playdate battery; it’s a win-win.
A major way to achieve this is to not redraw the screen more than is needed. You can check how much of the screen is being redrawn in your game if you enable the "Highlight Screen Updates" option in the Playdate Simulator:
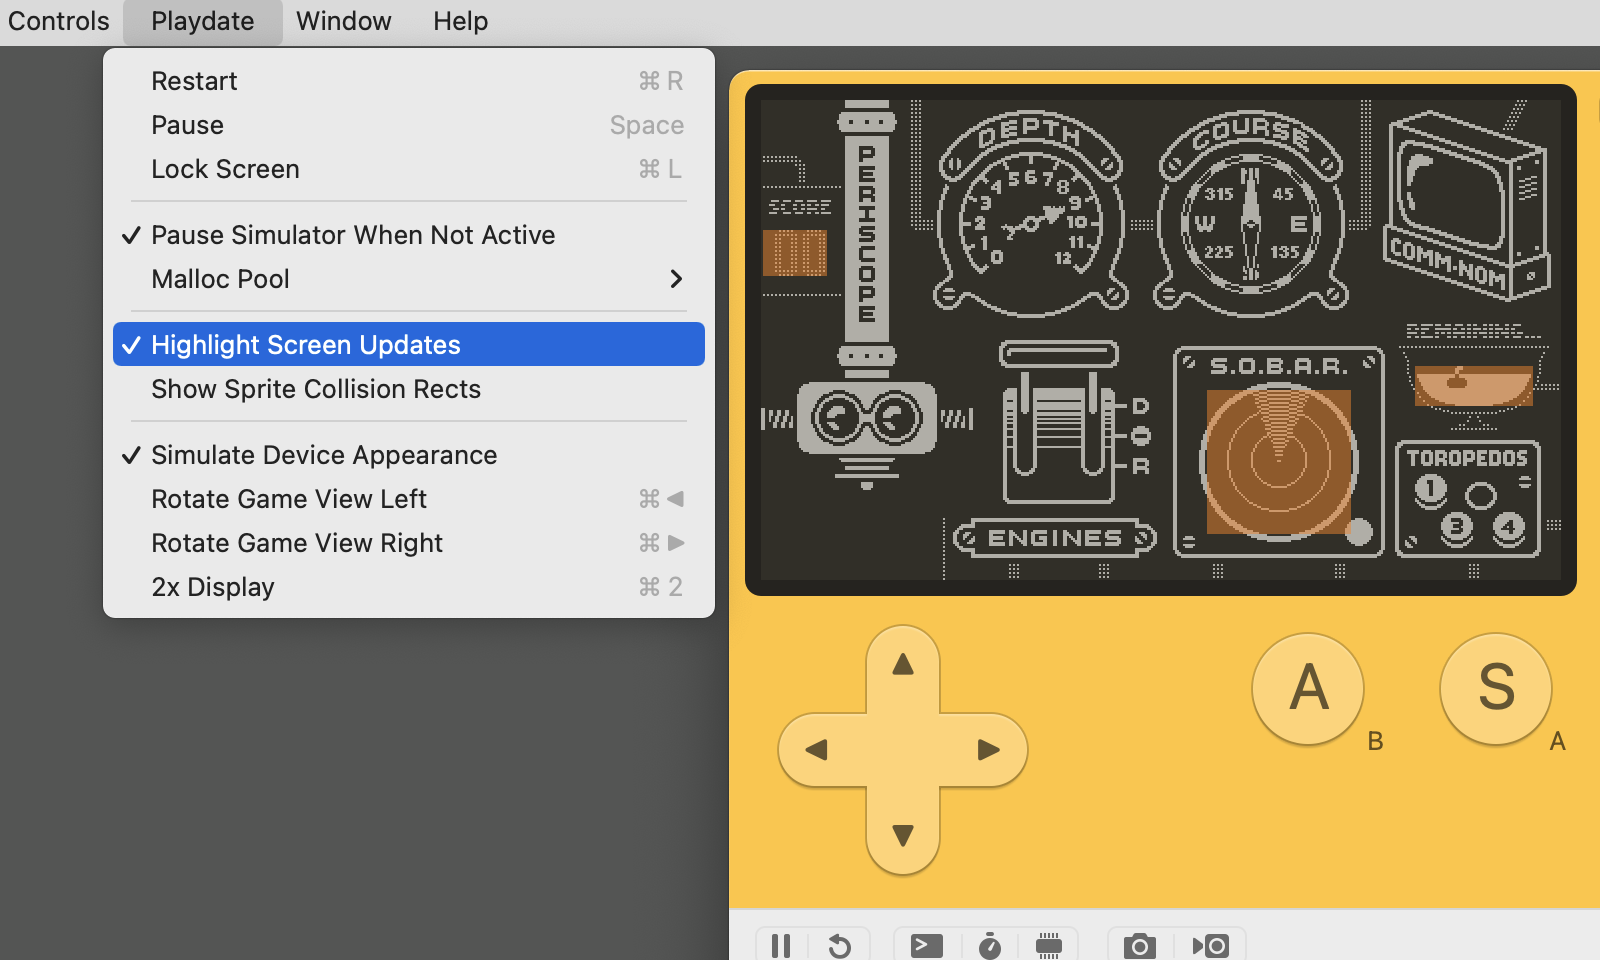
If large portions of your screen are constantly painted orange, it likely means you could make improvements to how the graphics are drawn.
If you use our sprite system, it will handle a lot of this work for you. Sprites are redrawn only when the data and the bitmaps backing them are actually changed; a still sprite will be drawn only once, and it won’t be repainted until something about it changes. This, again, is good for performance, and also for the batteries of your players’ devices.
Even if you’re not using our sprite system, you don’t need to redraw the entire content of the screen on each update, just the areas which have changed. This can be a significant performance and battery life gain for non-action games where display elements move less frequently.
9. Playdate Simulator vs. Playdate hardware
9.1. Simulator performance
The Playdate Simulator is a desktop app that can preview your game before transferring it to a Playdate. It’s a fast and convenient way to check your code quickly. Please remember, however, that the Simulator doesn’t faithfully emulate the performance of the Playdate console hardware. Your code may run significantly faster in the Simulator, or it may have different performance patterns. Optimize for the hardware, not the Simulator.
9.2. Simulator appearance
Due to differences in resolution, on most computer displays Playdate Simulator will appear larger than an actual Playdate held next to it. Don’t rely on the size of your text and sprites in the Simulator to decide whether your graphics will read comfortably.
The Simulator can attempt to mimic the appearance of the Playdate by turning its pure black and pure white into grays that roughly match a well-lit Playdate screen. This is just an approximation; Playdate isn’t backlit and won’t have the same black-to-white contrast in all environments.
Whenever possible, check the performance and appearance of your game on an actual Playdate—it’s how your players will play it.